

Running Kubernetes On My Raspberry Pi Subnet
Installing, configuring and running a Kubernetes cluster on my Raspberry Pi subnet

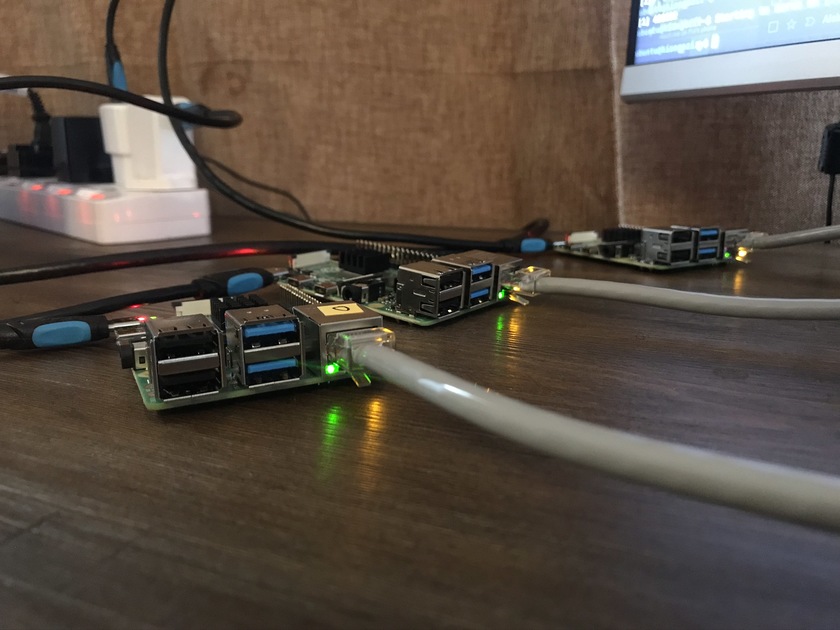
Most of my projects start from a point of curiosity. This one is no different. I’ve tinkered with Raspberry Pis over the years, but I’ve never tried anything on this scale. Three Raspberry Pis connected via a network switch to create a tiny home lab. The perfect environment to run destructive experiments.
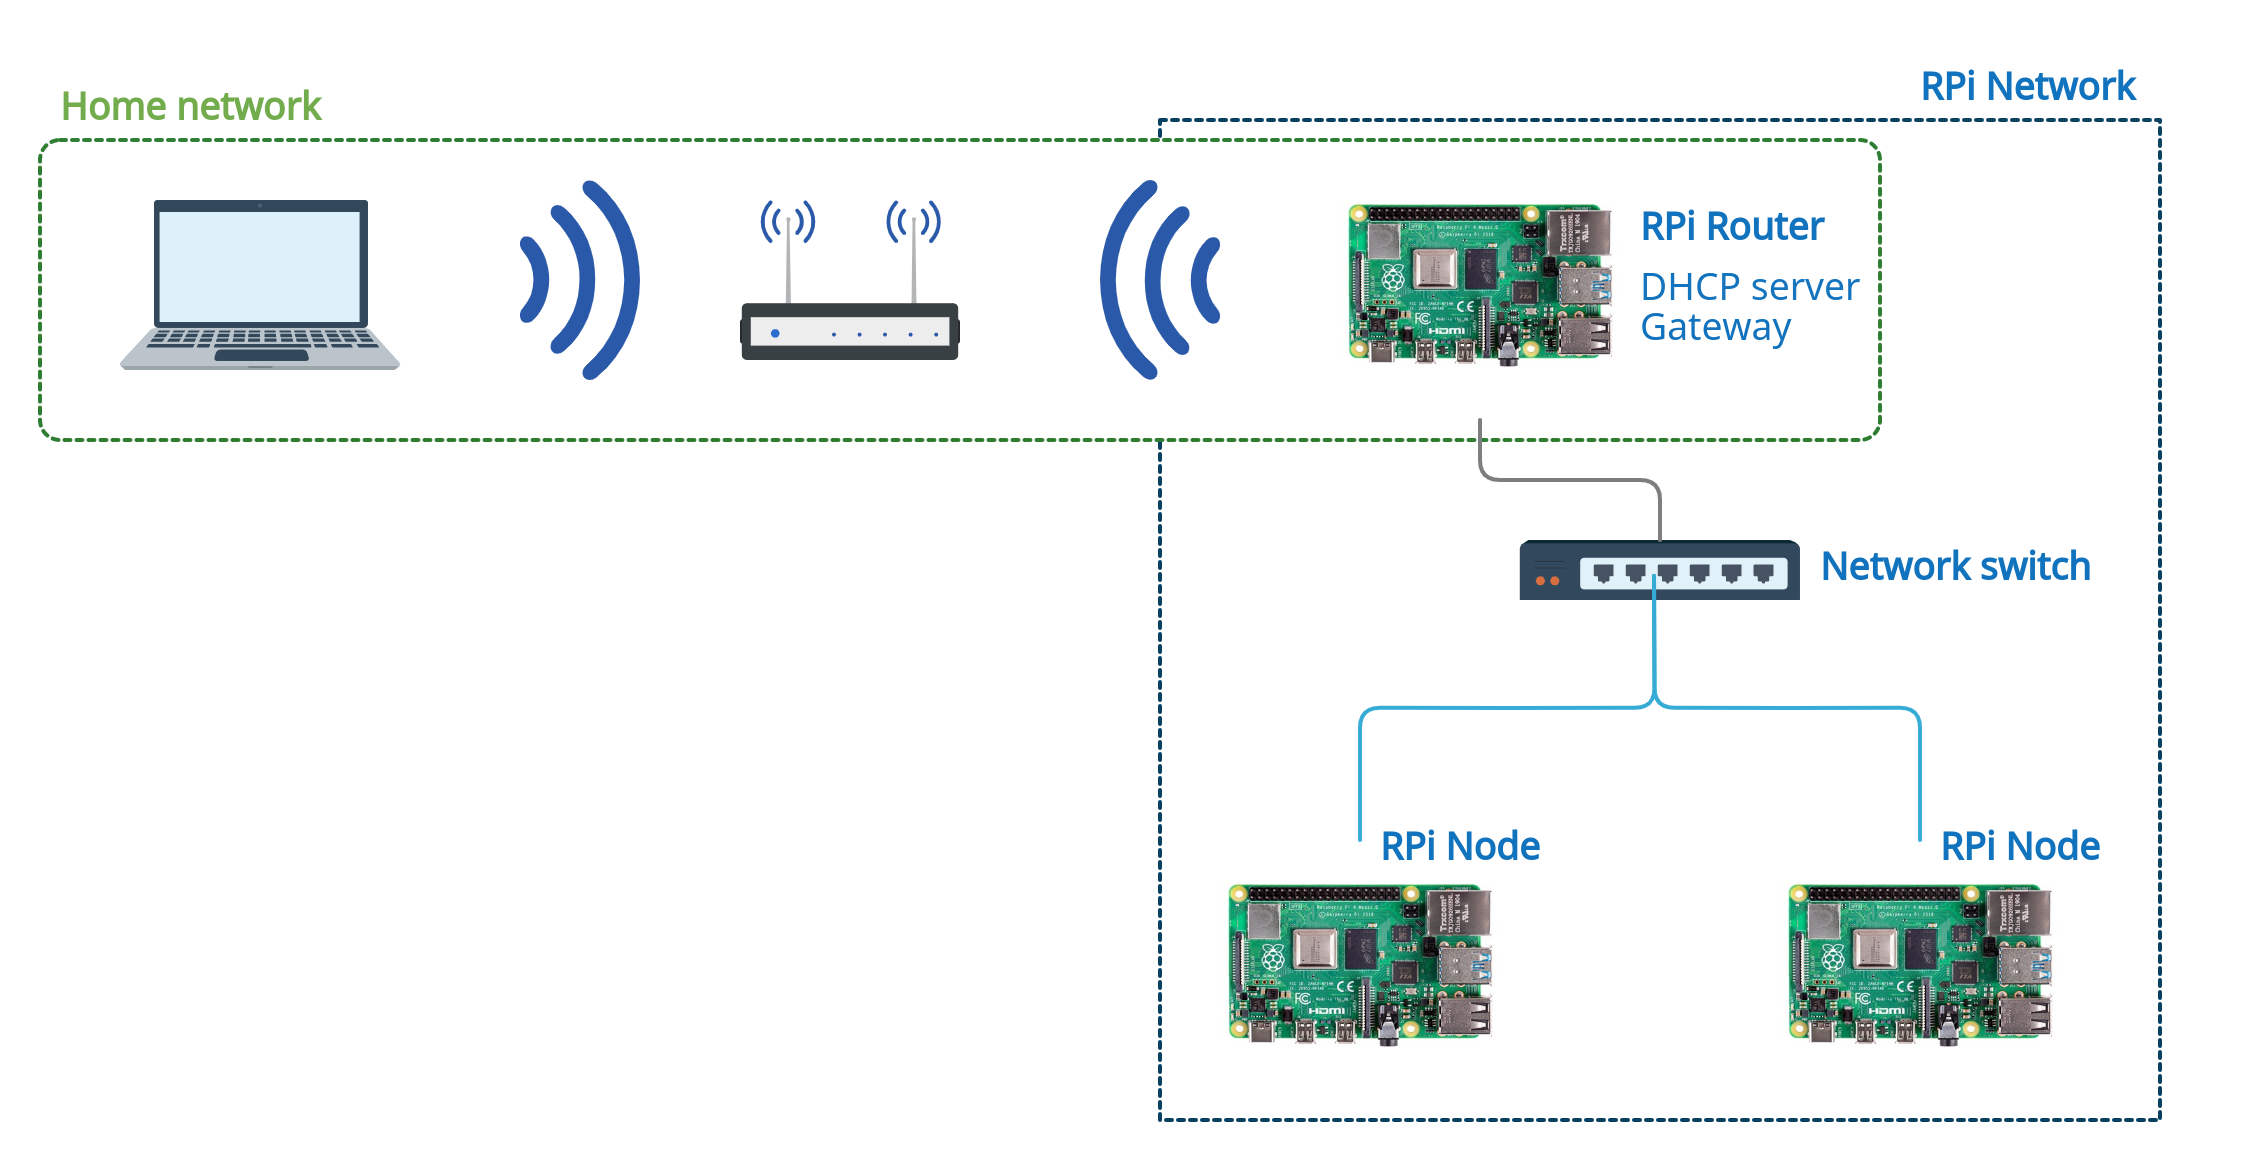
As illustrated above, the Raspberry Pi network is a private subnet. One Raspberry Pi serves as a router, leasing out IP addresses to any hosts connected to the private subnet switch. Additionally, the router acts as an internet gateway by forwarding internet from its Wi-Fi interface (wlan0, connected to my home Wi-Fi) to its Ethernet interface (eth0, connected to the private subnet).
This is the list of the components that make up my RPi network.
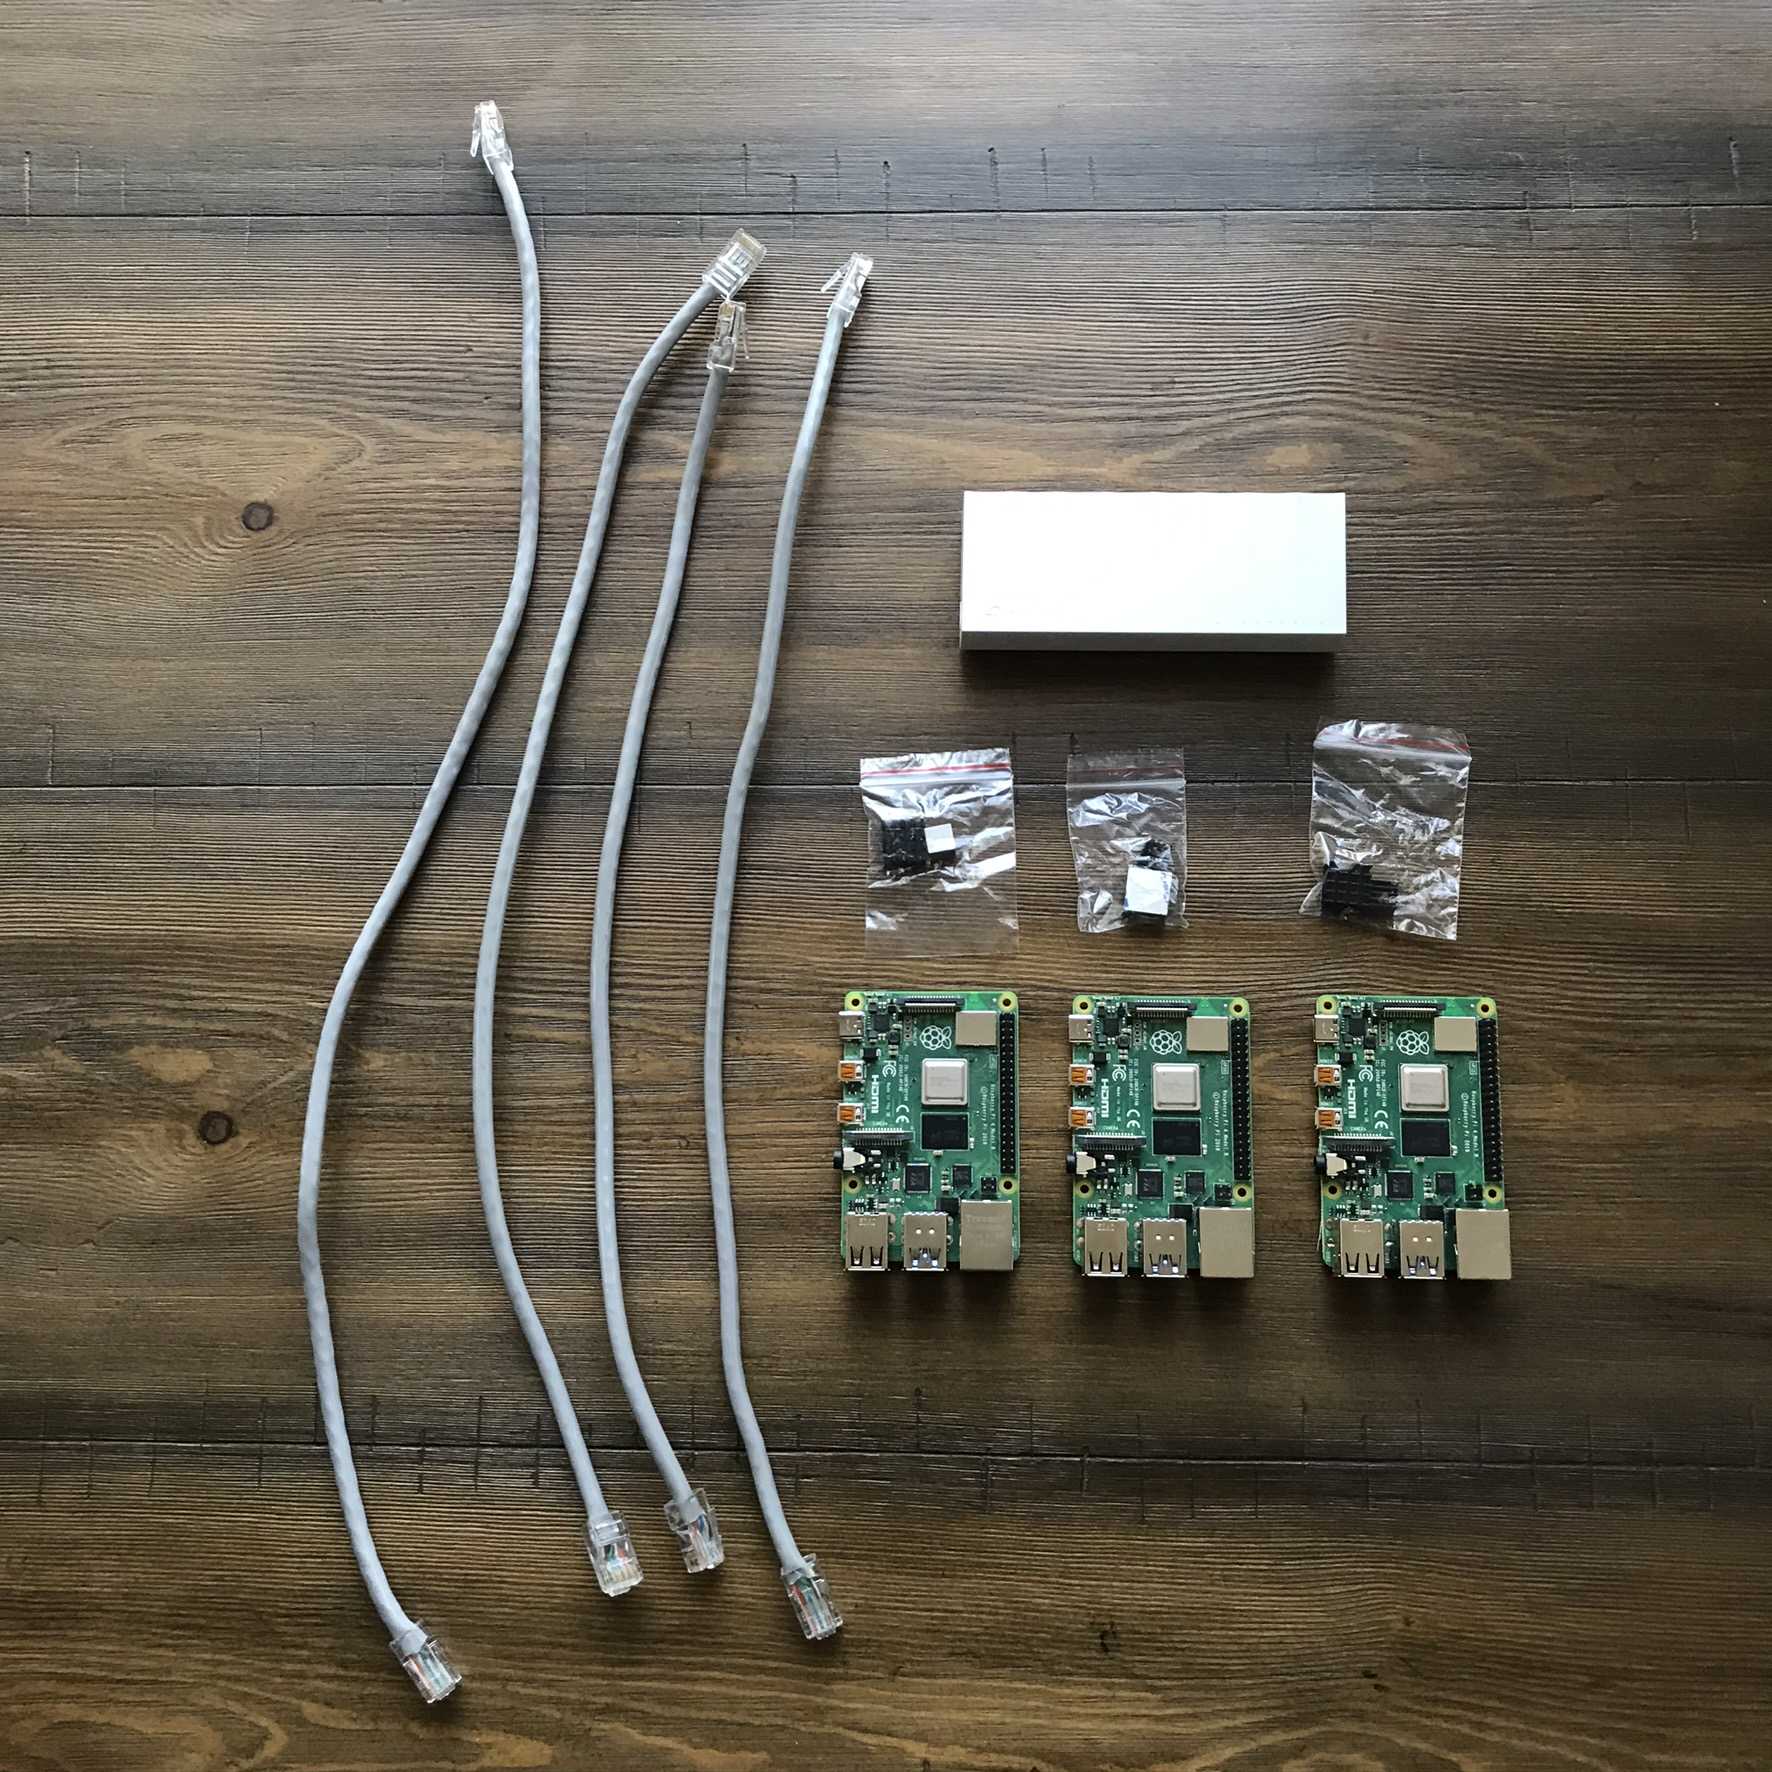
I couldn’t find a local supplier with 1 ft flexible Cat6 Ethernet cables, so I had to get a 1 m Giganet Cat6 UTP Pure Copper Ethernet Cable, cut it up into 4 pieces and attach RJ45 connectors to each of them. Functionally, they serve their purpose but aesthetically, my Pi layout is restricted.
I bought a generic USB charging hub which, shocker, could not power more than two Pis at a go. I’m currently powering each Pi independently using old phone charging heads. Not the best setup, but it’s the best I could do for now.
The first step is installing an Operating System on the Raspberry Pi that I intend to use as my router. There are a number of options available but based on my use case Ubuntu Server 20.04 was an obvious choice. I recently found out that they have an arm64 release built specifically for the Raspberry Pi.
Ubuntu has a well written tutorial on how to install the OS on a Raspberry Pi. For the sake of brevity, I will not rewrite the steps on this post, It’s easier to follow the documentation as is on the Ubuntu support page. I set up a Wi-Fi connection on the Pi and skipped step 5 because I won’t be needing a desktop environment on the RPi router.
The RPi router will serve as a jump server, connecting the private subnet to my home network. For this reason I needed to assign it a static IP address on my home network. This was my process:
ip addr show wlan0 | grep link/ether | awk '{print $2}'192.168.1.10.I could now ssh into my RPi router on ubuntu@192.168.1.10.
I’ll be running a DHCP server listening on eth0. Before setting that up I need to configure a static IP address for the RPi router’s eth0 on the private network.
Ubuntu 17.10 and later uses Netplan as the default network management tool. Netplan’s configuration are stored in the /etc/netplan directory. Ubuntu Server 20.04 is provisioned with cloud-init, I needed to disable it first before assigning a static IP address to eth0.
I created the file /etc/cloud/cloud.cfg.d/99-disable-network-config.cfg and added the following:
network: {config: disabled}Then I assigned the static IP address 10.0.0.1/8 to eth0 by creating the file /etc/netplan/01-netplan.yaml and adding the following:
network:
    ethernets:
        eth0:
            addresses: [10.0.0.1/8]
            nameservers:
                addresses: [8.8.4.4, 8.8.8.8]
version: 2Next, I installed dnsmasq (short for dns masquerade) to serve as my DHCP server.
# install dnsmasq
sudo apt update && sudo apt install dnsmasq
# backup the default dnsmasq config
sudo mv /etc/dnsmasq.conf /etc/dnsmasq.conf.bak
I created a new dnsmasq config sudo vim /etc/dnsmasq.conf:
# DHCP should lease addresses over eth0
interface=eth0
# Listen on the static IP address 10.0.0.1
listen-address=10.0.0.1
# Enable dnsmasq's integrated DHCP server
# and define 96 available address leases
dhcp-range=10.0.0.32,10.0.0.128,12h
# declare name servers
server=8.8.8.8
server=8.8.4.4
# Bind dnsmasq to eth0
bind-interfaces
# prevent packets with malformed domain names from forwarding
domain-needed
# prevent packets from non-routed address spaces from forwarding
bogus-priv
# Use the hosts file on this machine
expand-hosts
Running sudo service dnsmasq status returns status failed because eth0 is not connected, yet. dnsmasq will fail to assign an IP address to an interface if it’s not up. That’s okay, we’ll get to the networking part later on.
In my topology description above, the RPi hosts in my private network have access to the internet through the Router Pi. To achieve this, I’ll be setting up internet forwarding on the Router Pi.
First, I enabled IP forwarding by uncommenting the following line in /etc/sysctl.conf:
net.ipv4.ip_forward=1Then I added a masquerade rule to packets leaving the wlan0 interface. This means that traffic through wlan0 can be rerouted without disruption.
sudo iptables -t nat -A POSTROUTING -o wlan0 -j MASQUERADEThe next command forwards ESTABLISHED and RELATED packets from wlan0 to eth0.
sudo iptables -A FORWARD -i wlan0 -o eth0 -m state --state RELATED,ESTABLISHED -j ACCEPTThis last command forwards all packets from eth0 to wlan0.
sudo iptables -A FORWARD -i eth0 -o wlan0 -j ACCEPTFinally, my iptables rules looked like this:
Chain INPUT (policy ACCEPT 30335 packets, 1580K bytes)
 pkts bytes target     prot opt in     out     source               destination

Chain FORWARD (policy ACCEPT 0 packets, 0 bytes)
 pkts bytes target     prot opt in     out     source               destination
    0     0 ACCEPT     all  --  wlan0  eth0    0.0.0.0/0            0.0.0.0/0            state RELATED,ESTABLISHED
    0     0 ACCEPT     all  --  eth0   wlan0   0.0.0.0/0            0.0.0.0/0

Chain OUTPUT (policy ACCEPT 30665 packets, 1624K bytes)
 pkts bytes target     prot opt in     out     source               destination
I installed iptables-persistent to save the iptables rules permanently.
sudo apt install iptables-persistentNote: Remember to sudo reboot before proceeding to the next step.
I wrote the Ubuntu Server 20.04 image for the Pi hosts in almost the same way I did it for the Router Pi, except setting up a Wi-Fi connection. These hosts will access the internet via forwarded connections on the Router Pi.
The final stage is connecting all the Pis to the network switch and powering up the switch. All that toil has to amount to something.
Running sudo service dnsmasq status should return Active: active(running):
● dnsmasq.service - dnsmasq - A lightweight DHCP and caching DNS server
     Loaded: loaded (/lib/systemd/system/dnsmasq.service; enabled; vendor preset: enabled)
     Active: active (running) since Tue 2021-01-12 12:12:11 UTC; 20min ago
    Process: 1249 ExecStartPre=/usr/sbin/dnsmasq --test (code=exited, status=0/SUCCESS)
    Process: 1356 ExecStart=/etc/init.d/dnsmasq systemd-exec (code=exited, status=0/SUCCESS)
    Process: 1379 ExecStartPost=/etc/init.d/dnsmasq systemd-start-resolvconf (code=exited, status=0/SUCCESS)
   Main PID: 1377 (dnsmasq)
      Tasks: 1 (limit: 4436)
     Memory: 2.7M
     CGroup: /system.slice/dnsmasq.service
             └─1377 /usr/sbin/dnsmasq -x /run/dnsmasq/dnsmasq.pid -u dnsmasq -7 /etc/dnsmasq.d,.dpkg-dist,.dpkg-old,.dpkg-new --local-service --trust-anchor=.,20326,8,2,e06d44b80b8f1d39a95c0b0d7c65d08458e880409>
Running cat /var/lib/misc/dnsmasq.leases should list two DHCP leases, assigned to the two hosts in the private network. I tested internet forwarding by sshing into each Pi using the IPs on their leases and checking that they have internet access.
That’s it!
I had a hard time figuring out how to assign a static IP address to eth0 on the Router Pi. The last time I did that was before netplan, when all network configs were on one file: /etc/network/interfaces.
The hardware currently sits in a disorganized state on my work desk. I ordered a Raspberry Pi cluster case and flexible Cat6 Ethernet cables so that I can have a better organized home lab.
The next article in this series is Running a Kubernetes Cluster On My Raspberry Pi Subnet
Installing, configuring and running a Kubernetes cluster on my Raspberry Pi subnet